Animal Jumping Puppets
Grades 3-4
Art
207-03, Group 1
Lily
Gicker, Kelly Bullak, Erin Moore, & Ariella Dalton
Objectives
Students will learn about proportions of body parts.
Students will learn how to create moving parts.
Students will learn how to cut shapes with detail.
Students will learn how to attach string and tie knots.
Student's Materials
9"x12" Construction Paper (assorted colors)
Markers
Scissors
Hole punch
Brads (4 per puppet)
String
Chopsticks (one per puppet)
Newspaper (to lay over the tables)
Teacher's Materials
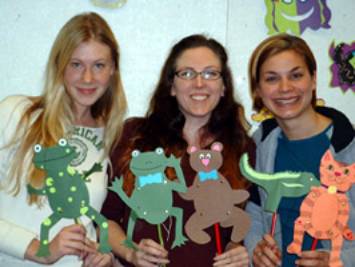
Examples of different animal jumping puppets
Javanese shadow puppet and slides of puppets from various cultures
Vocabulary
Proportion
Puppet
Brad
Indonesia
Procedure
1. Intro: Discus the historical and cultural background of puppets. Show slides and examples.
2. Demonstration on how to make the puppets.
3. Lay newspaper over the tables
4. Think of the animal you want to create and sketch it on construction paper.
5. Cut out body & head, arms, and legs.
6. Add facial features & decorate.
7. Punch holes (four in the body where legs and arms are to be attached; and two in each arm and leg- one for the brad and one for the string)
8. Attach brads
9. Glue on chopstick
10. Attach String and test it out!
11. Closure: Share puppets with the class and discus what they have learned.
Suggestions
-Extend the activity by having students create puppet shows.
-In the beginning talk about the basic shapes of animals, how many legs they
have, ect.
-The two holes in the arms and legs might be confusing; you might want to draw
it large - scale on a board to
show which hole is for the brad, and which hole
is for the string.
-Larger string or yarn is easier to tie.
-Have people available to help the students tie the string, this may be a
little
difficult for some third graders.
-Emphasize the size and shape that the body parts must be in order for it to
work well (if the arms/wings are
too fat/round it will not work)
-Suggest having only two wings instead of two arms and two legs- it's simpler.
-Have students make people puppets or other figures that go with what is
currently being taught in the
class.
Artistic Development
Third and fourth graders are a combination of both the schematic stage and the realistic stage. The third grade students may still be at the schematic stage. The schematic stage deals with developing line and shape making skills. The students work to improve their muscular coordination in handling art tools such as scissors, glue, or clay. There is no overlapping, items are placed randomly in picture space, and bodies are made up of geometric figures. Proportions of figures usually depend on emotional or physical value.
The realistic stage is a bit more
advanced and probably will not be present in a student until the fourth grade. This stage begins with a newfound
realistic approach to making art. The students still may be holding on to childhood beliefs and
fantasies, but their thinking about what they see changes dramatically.
Geometric shapes no longer suffice to make all objects. They can now see
that the sky meets the horizon and that objects can overlap. They pay
more attention to detail on their figures, especially to hair and
clothing. They learn to shade objects, add shadows, and make distant
objects smaller. The students use more realistic colors and are more critical
of their work. By this stage the students are ready to learn about visual
space and perspective.
Our art project will be great for the third and fourth grade for four main
reasons. First, our puppets will help the students to learn about proper
body proportion by having them make even body parts. Second, this
activity is great for motor skills because much of this project is done by
cutting and putting things together. Third, the student is free to give
as much detail as they like to the puppet's characteristics. And lastly,
making puppets is fun!
Reference
Herberholz, Donald and Barbara Herberholz. Artworks for Elementary Teachers 9th ed. Boston: McGraw Hill, 2002.