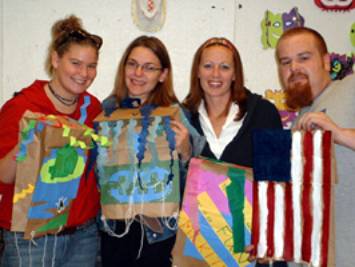
Brown Bag Kites
Grades
3-4
Art
207-03, Group 2
Jacqueline
Gallinetti, Tim Jaramillo, Britney Best, Alyson Strickland, Jenn Badoud
Objectives: At the end of this lesson the student will be able to...
1)
Observe and discuss kites and how they function (fly)
2) Apply recycled materials to artwork/kite making
3) Utilize and develop self expression
4) Appreciate the art made by others and
themselves
Student Materials:
1)
Large brown paper bags
2) Strong "kite" string
3) Scissors
4) Hole puncher
5) Ring reinforcements (available at office
supply stores, buy extra)
6) Glue or pasts
7) Tempera or acrylic Paint (multiple colors)
8) Crayons, markers, pencils (decorative
materials)
9) Paper streamers or crepe paper
10) Other light objects for decoration: glitter, paper, buttons etc
Teacher Materials:
1)
Book: "let's make a kite", with historical/cultural information
2) Previous student artwork examples
Vocabulary:
1) Kite
2) Wind
3) Air flow
4) String
5) Fly
6) Culture
Procedures:
Introduction:
1) Discuss contents of book, kite building process, and historical/cultural
background
3) Instruct students to hole-punch, 4 holes in top of brown paper bag.
One hole in each corner of the bag. Add reinforcements to holes.
Cut two pieces of "Kite" string about 30 inches long each; tie the
string through the holes in bag, creating two loops.
4) Cut another string about 30 inches long. Loop the string through the
other two strings creating a handle. You may have to assist students with
this section.
5) Decorate bag with decoration materials. Finally, cut multiple
streamers about 1 foot (12 inches) long, glue to bottom of paper bag. Set
aside to dry.. And now the kite can fly!!
Closure:
1) Take class outside (hopefully it is windy) and
test the kites
2) Discuss why some fly and why some do not fly
3) Emphasize cultural and historical background
information
4) Come back inside and hang kites up in
classroom
Suggestion/Comments:
Make sure you have enough reinforcements for each kite. Masking tape can be a substitute for the reinforcements. Monitor the students' decoration materials; make sure the kite is not too heavy to fly.
Characteristics of artistic
development in the age group:
Students at the 3rd and 4th grade
level are between the ages of 7 years to 9 years old. According to
Lowenfield's artistic development theory, students at this age are leaving
behind their first representational attempts at the pre-schematic stage.
They enter the schematic stage and develop the achievement of a form concept.
Children's art at this stage is created depicting concepts and not perceptions,
which are indicative of the child's knowledge of the environment. Space
representation includes drawing of the sky and other baselines, in attempt to
create a more complete atmosphere, with little or no overlapping. Human
representation includes geometric body shapes and correct placement of limbs
(legs, arms, etc). Proportions are drawn depending on the objects
emotional value.
The schematic stage is an important stage in a child's artistic development
because, when observing or assessing the child's art you are able to see the
way in which a child begins to interpret the world, as well as their emotional
development in regards to their environment.
Historical and cultural
content:
It is not known when the first
kite was flown, but its popularly held that the Chinese led the way with early
aerodynes copying the form of birds. In Japan, kites were used for
religious purposes and they still do this today. On May fifth each year
its "Boys day" and any home with a boy flies these kites called carp
windsocks. By the 1600's, the traditional diamond shape kite had become
popular in Europe and was widely used there.
Kites became very popular and were being used for many things. For example,
scientists used kites to figure out atmospheric phenomena by using the kites to
carry thermometers to measure such things as air temperature at various
altitudes. In addition, kites were used to lift cameras for aerial
photography since the 1870's. Other people, such! as the French designer
Maillot, used kites to carry heavy payloads from one place to the other.
As time went by people had many different ideas for kite use. Another
popular idea was when Lawrence Hargrove decided to design box kites for
meteorological forecasting. The stability of his kites made it ideal for
man lifting. This idea of man lifting was also seeked out by another
pioneer, but he did not have as much success. His kites were used during
the Royal Navy Reconnaissance trials and failed. They collapsed during
the trial, later killing him, and one other.
A new form of kites started to emerge in 1963. By the 1970's new kite,
designs were booming because of the wider variety of materials. Today we
see kites used for many different things such as parachutes and pleasure.
Over time, we have come up with new contraptions to take over the duties of
many things that kites did; but kites were the beginning of a new curiosity
era.
Suggestion/Comments:
After the presentation of our well developed lesson plan to the class we realized that there were a few suggestions made by both the students and the professor that would be helpful to note. Most of our peers agreed on the fact that the lesson was both fun and simple. We received many compliments on the pre-cut strings, hole-punched and reinforced bags, as well as the music that we had to "stimulate the mind" during our lesson. Some of the problems with our lesson included the fact that it was difficult to complete both sides of the bag in such a short amount of time. In addition, some thought that there was too much freedom for the children to choose which decorations they would use to decorate their kites. Our professor complimented our group on the uniqueness of our lesson and enjoyed that she had never thought about it prior to our lesson instruction. Although, she di! d comment that we should concentrate on creating a more strict subject matter for the children to work with on their kites.
References:
Book: "The Creative
Book of Kites" Provided by Masami Toku
Various Slides of historical kite making and background. Provided by
Masami Toku
Guidelines for case study research
class handout. Provided by Masami Toku
Art lesson idea: Found on
Internet at: www.kinderart.com
"Brown Bag Kites"